Making Homemade Cured Salmon at home is one of my favorite kitchen projects. It transforms a simple fillet into something special. If you’re looking for a fresh, protein-packed brunch, this Homemade Cured Salmon sandwich is a staple in my routine. Here is how I do it from scratch.
Making this at home is so much better. It’s much cheaper than buying pre-packaged ones, and I can adjust the salt and flavors exactly how I like. Plus, since I’m making it from scratch, I know it’s fresh and clean.
1. The Curing (Gravlax style)
The word ‘Gravlax’ means ‘buried salmon.’ People used to bury fish in the sand to preserve it, but we’ll just use the fridge.
The secret to a great salmon sandwich starts with the cure. A simple mix of salt, sugar, and aromatics transforms the fish.
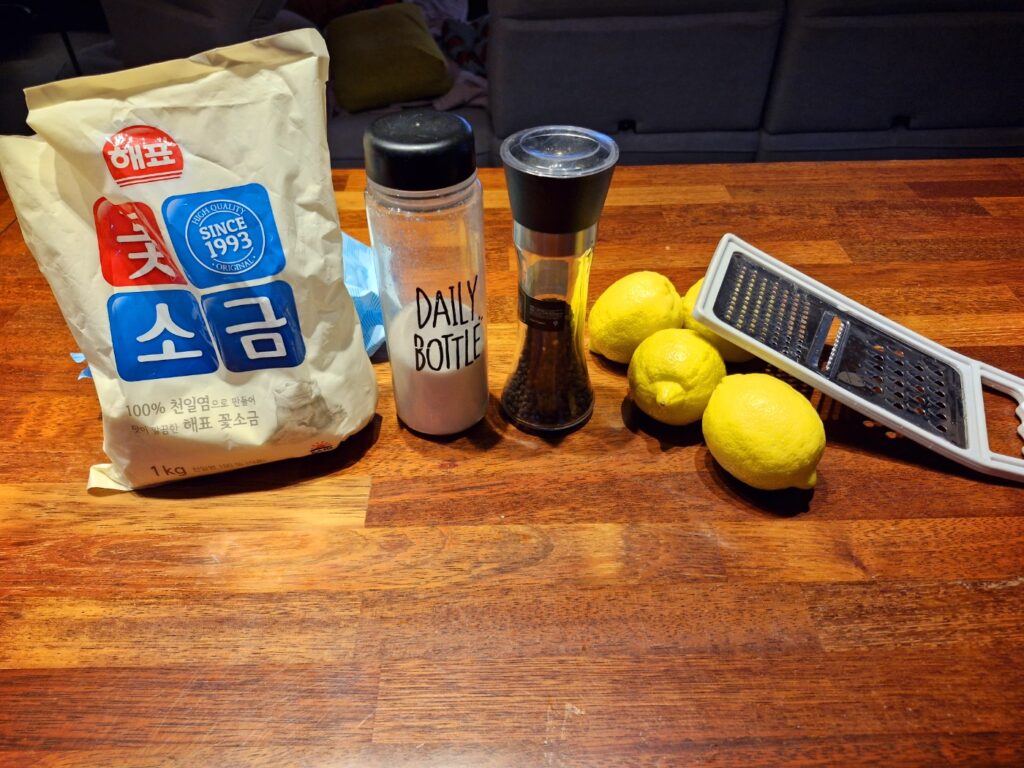
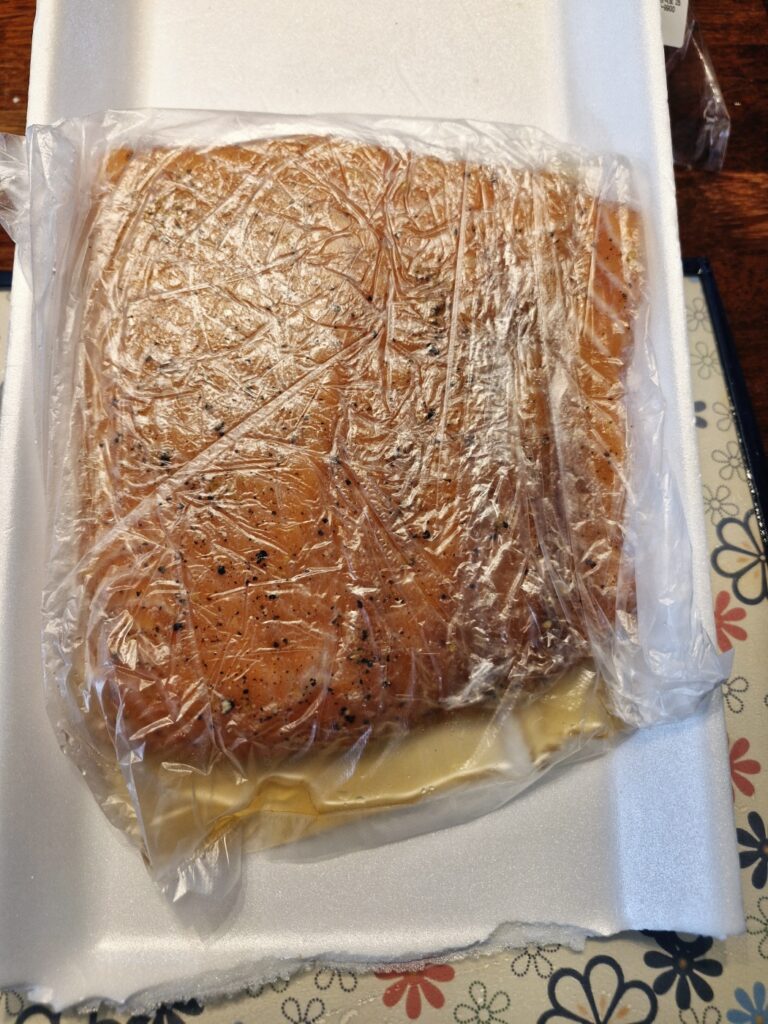
- Prepare the Cure: Mix 1 tbsp of coarse sea salt, 1 tbsp of regular salt, cracked black pepper, fresh lemon zest, and plenty of dill.
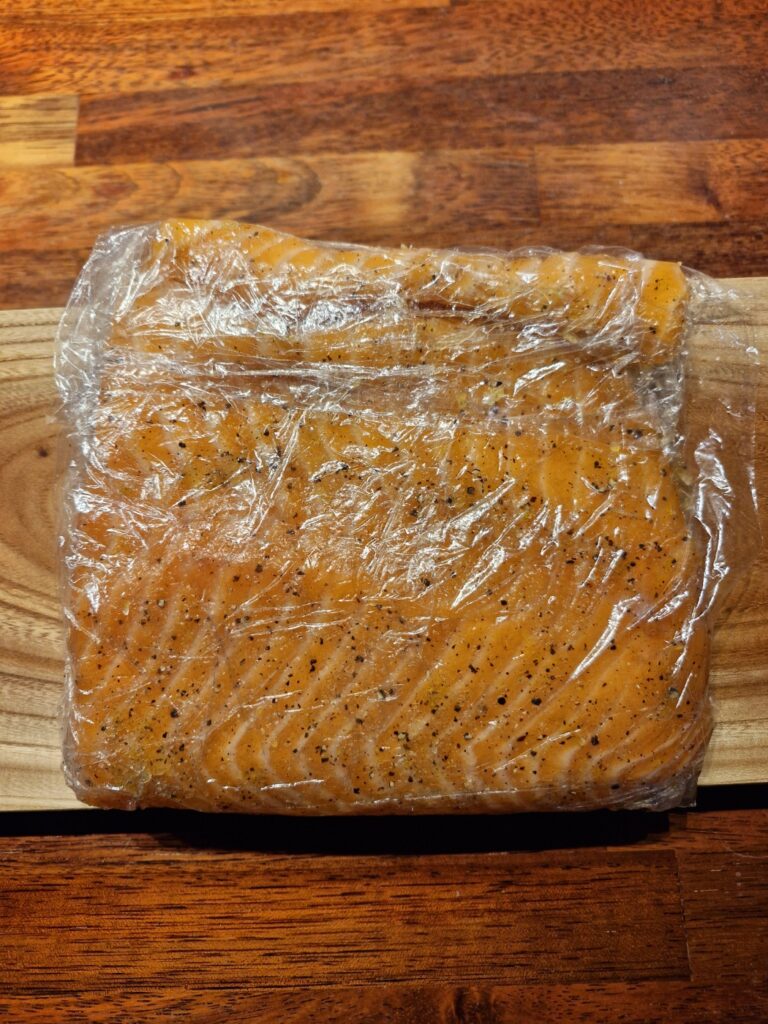
- Apply: Generously coat both sides of your fresh salmon fillet with the mixture.
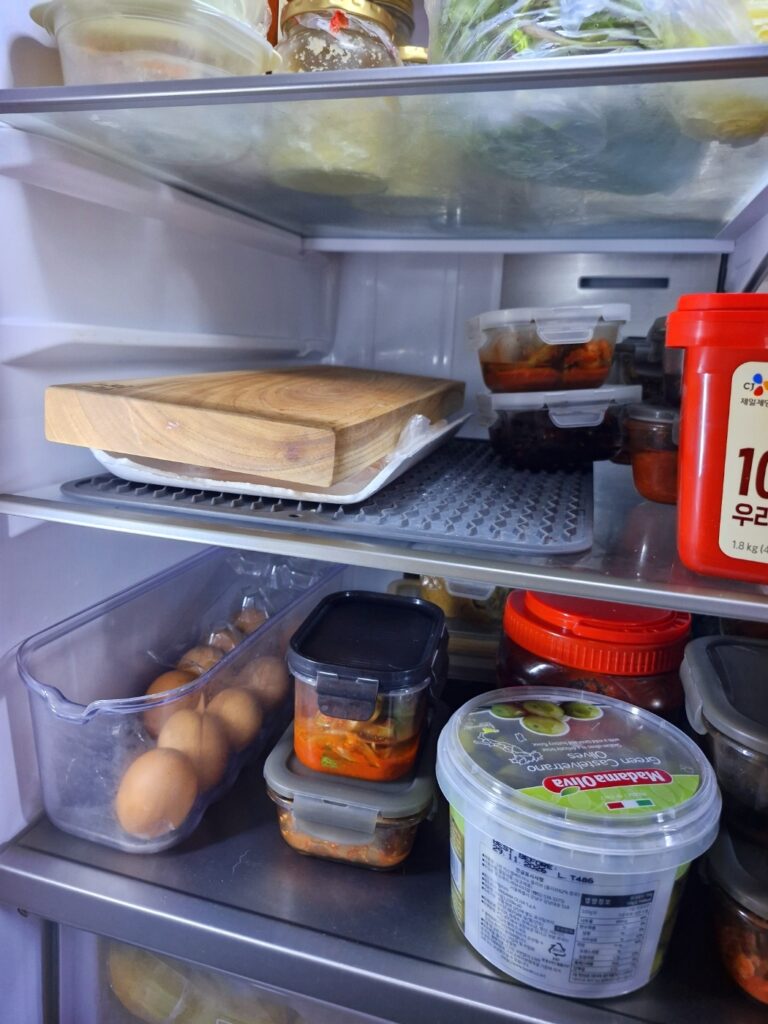
- Rest: Wrap it tightly in plastic wrap and let it cure in the fridge for 1 to 2 days.
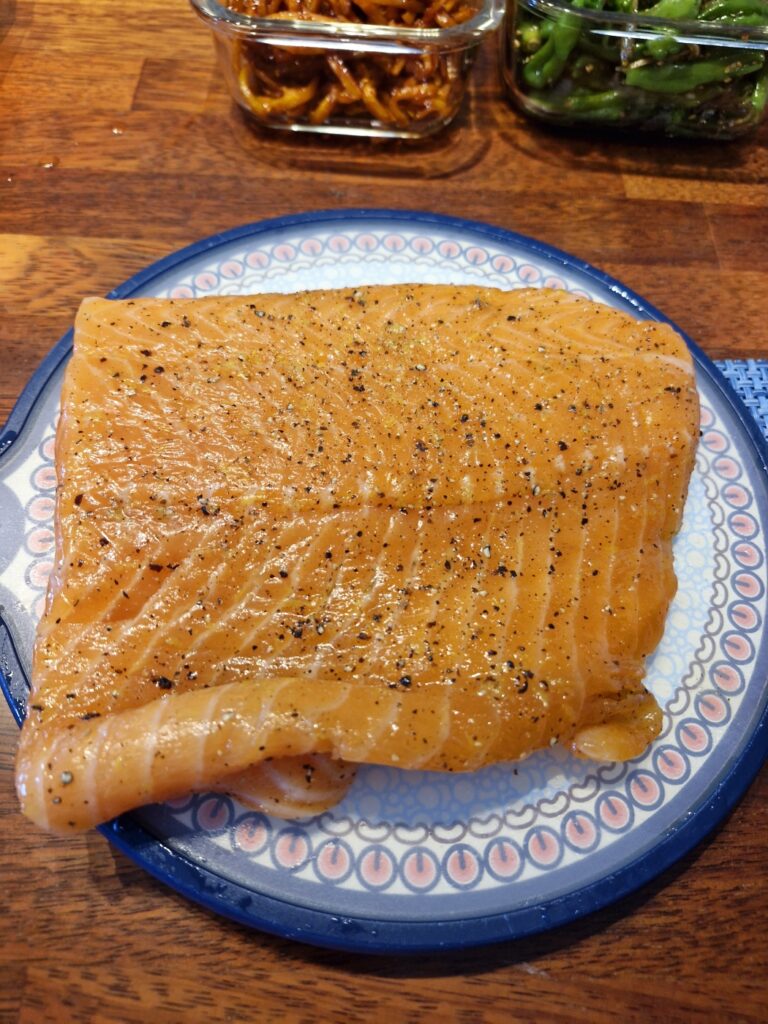
After 48 hours, you’ll notice the salmon has lost significant moisture, resulting in a concentrated flavor and a buttery, firm texture.
2: Getting Ready
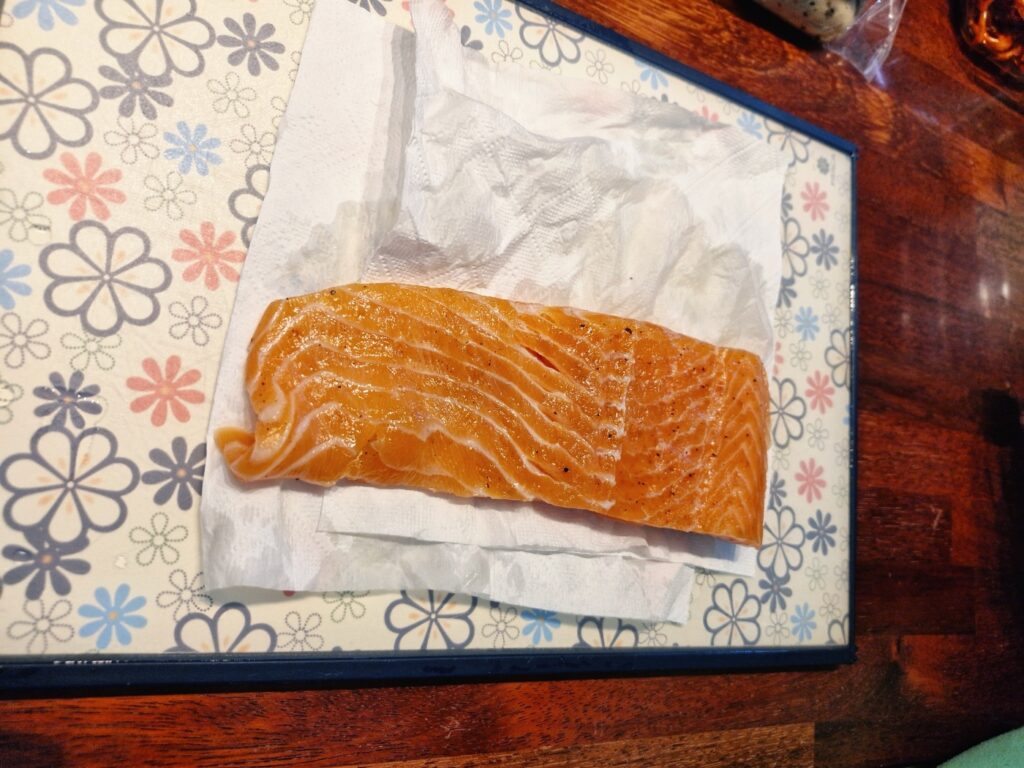
- Rinse & Dry: The salmon will be salty, so rinse it quickly under cold water and pat it completely dry with paper towels.
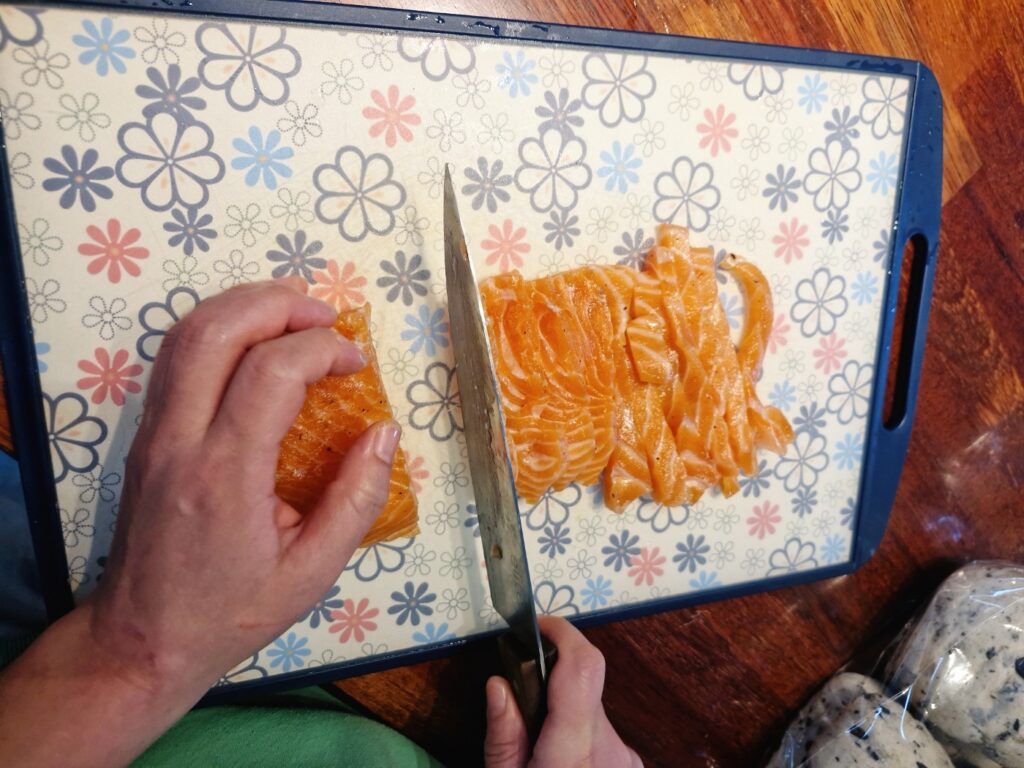
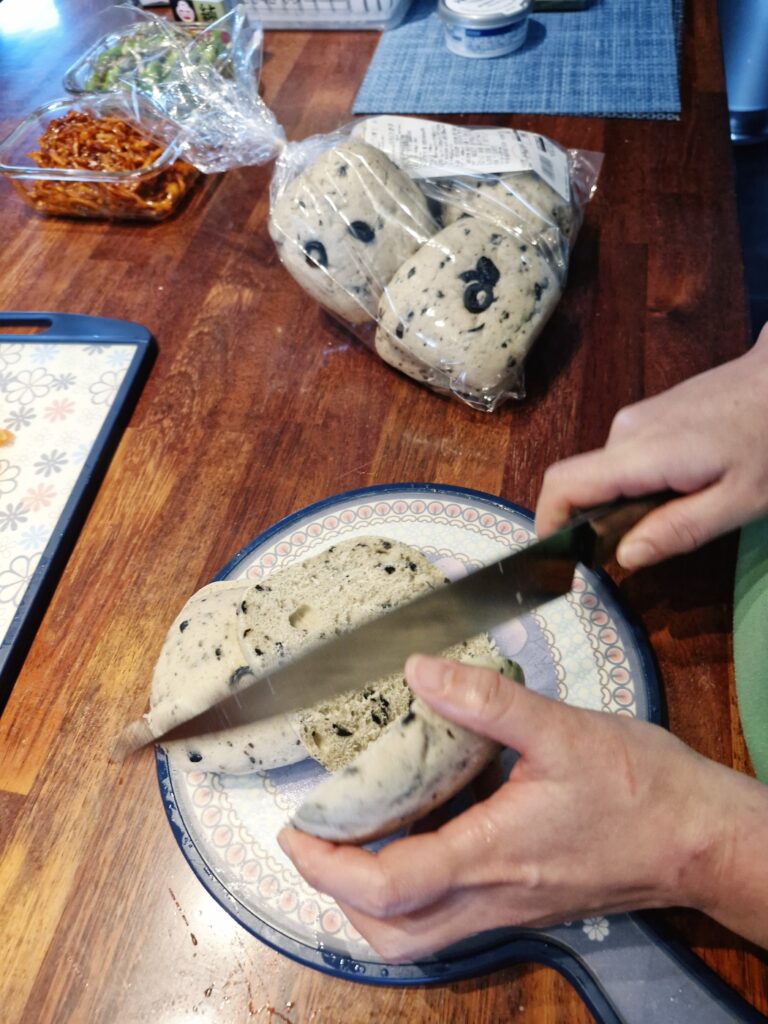
- Slice: Use a sharp knife to slice the salmon into bite-sized, thin pieces.
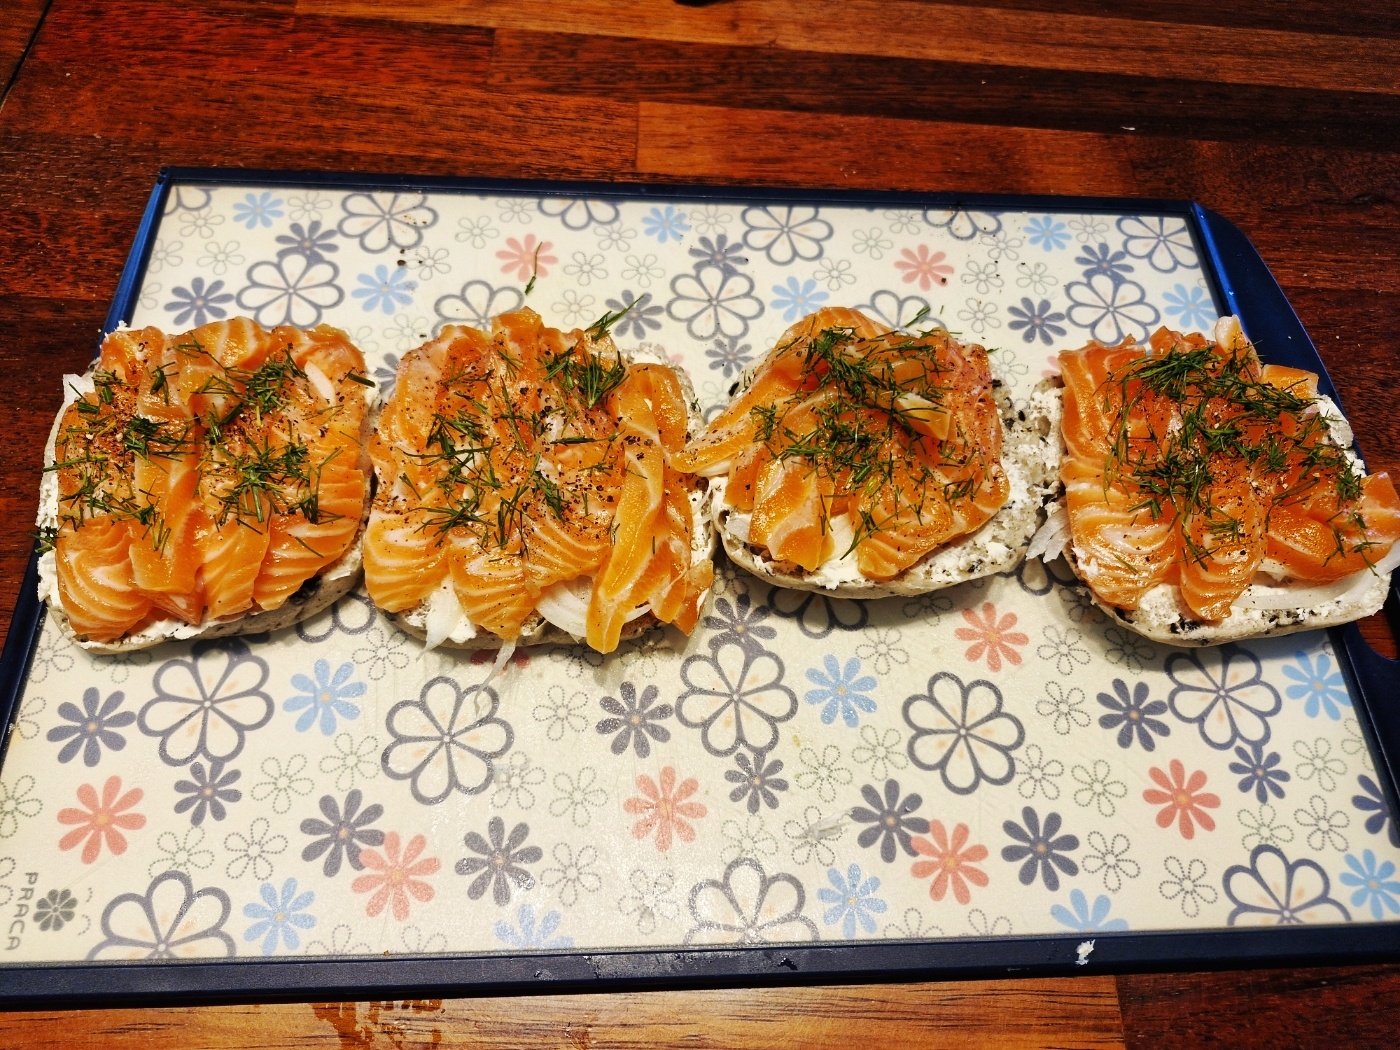
3. Making the Sandwich
Now, it’s time to eat. We like using black olive bread. Wife’s Little Trick: She uses Greek yogurt instead of cream cheese to keep it light. It’s a great way to enjoy the sandwich without feeling heavy.

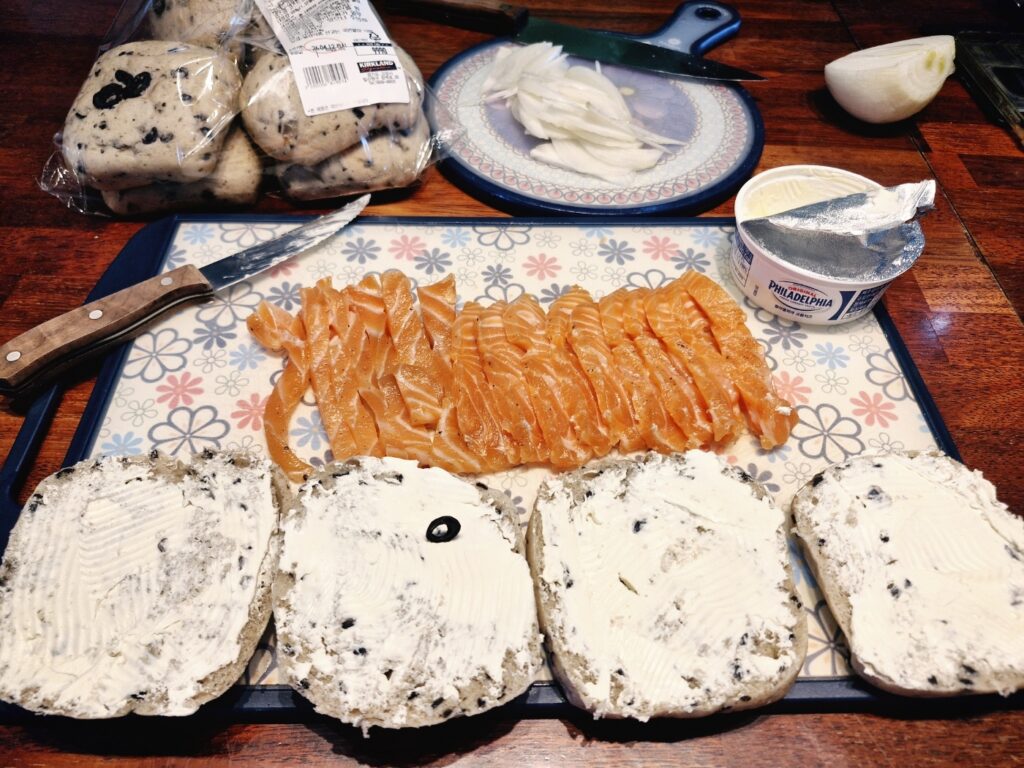
- The Base: Slice your bread and spread the Greek yogurt (or cream cheese) over the base.
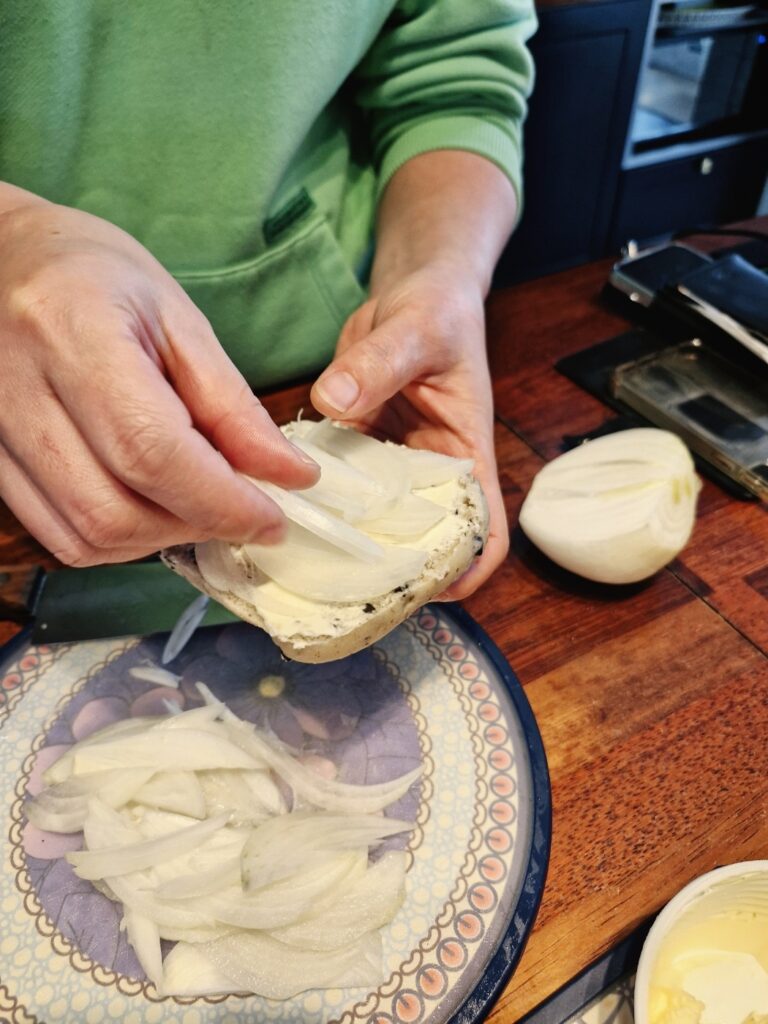
- The Layers: Place thinly sliced onions over the base. The sharpness of the onion cuts through the richness of the salmon
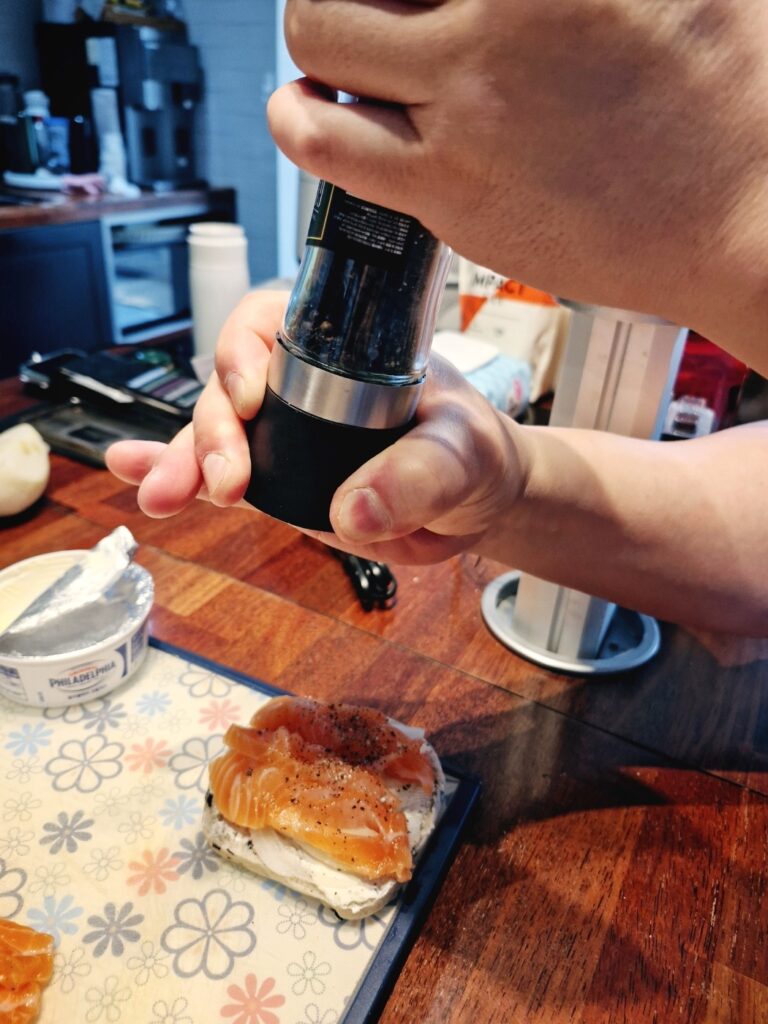
- The Salmon: Layer your homemade cured salmon on top and finish with a crack of black pepper.
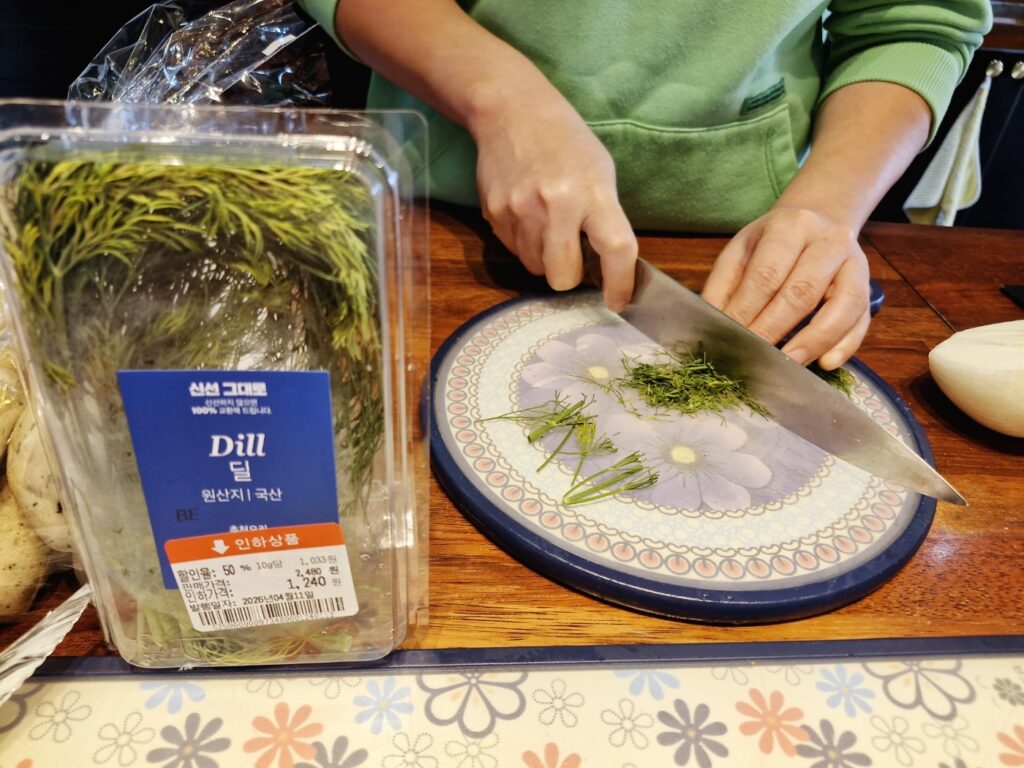
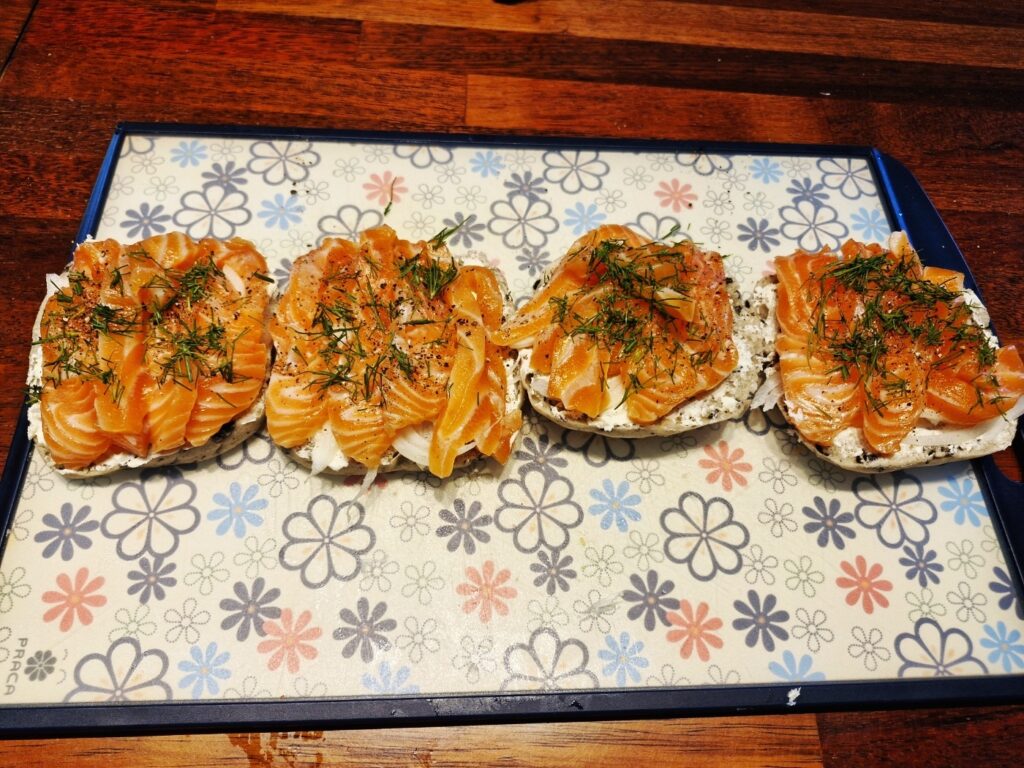
- The Garnish: Top with finely chopped fresh dill. For an extra briny kick, add a few sliced olives.

Why we love this
This sandwich is light and satisfying. It’s an excellent pairing for a glass of crisp white wine, a smooth whiskey, or even a refreshing craft beer.
We really enjoy this fresh sandwich at home. Hope you give it a try!
Read More: For those curious about the deep history of this Nordic tradition, check out this guide on Serious Eats.
🌿 Take a Glimpse into Our Paju Garden Life
Managing a large garden is a constant battle with nature, not a quiet walk in the park. In the hills of Paju, where the morning air still bites at -1°C, every tree we plant is a testament to our grit. If you want to see the reality of building a self-sufficient life from the ground up—beyond the polished photos—follow the link below. 👉 Spring in Paju: The Reality of Building a Self-Sufficient Garden
🍕 From Mud to Fire: The 30-Day DIY Pizza Oven Project
Gardening demands sweat, but the reward is found in the fire. When I’m not hauling junipers, I’m firing up the centerpiece of our backyard: a handmade Neapolitan pizza oven. This wasn’t a kit; it was a month of relentless brick-cutting, structural failures, and final triumph. If you want to see how we brought authentic Italian heat to the Korean countryside through sheer labor, check out my construction log. 👉 The 4-Stage DIY Pizza Oven: A Man’s Struggle for the Perfect Crust
🐟 Myeolchi-bokkeum: A Texture Game Changer
The secret to a complete Korean table isn’t just the main dish; it’s the contrast of textures. Stir-fried anchovies with shishito peppers provide a sophisticated salty-sweet crunch that resets your taste buds. I’ve refined a technique to keep the anchovies crisp and glazed without them clumping together. Master the texture here: 👉 The Ultimate Myeolchi-bokkeum Guide.